A few days ago, Scott Hanselman bought a $599 consumer 3D printer on Amazon. He then went on to share the next 16 hours worth of elation, frustration, moments of success and suicidal thoughts that go along with learning 3D printing on consumer hardware and open source tools.
My experience was even worse than his – as a company, we bought into the idea that $1000 worth of 3D printing machine should immediately bring us into the 3D manufacturing revolution. Months later, walking in to yet another night where the MakerBot printer had freaked out and spewed a massive tangle of spider-webby filament balls all over the floor, I was fully convinced that 3D printing, as an concept and industry, was a complete and useless pile of crap. We got 1 successful part for every 5 tries. We bought every kind of add-on available to heat up build plates, printed fan and enclosure mods, with some magic combination of painter’s tape and AquaNet hair spray being the only things that occasionally worked. Before writing it off altogether, we invested in the next level of equipment that held promise, and now work with a basic, professional-grade printer. We spent way more on payroll for someone to sit around and dink with the printer than we did on buying the professional printer. I made a rule that if anyone ever purchased any printer, part, or accessory from MakerBot ever again they would be immediately terminated. That was 2 years ago.
With that said, I challenged Scott to a Pro vs. Consumer 3D printing shootout – our Stratasys uPrint vs. his Simple Metal, to see the good, the bad, and the ugly of each approach, and find out how we compare on each side of the spectrum. We gave it one shot, no do-overs, using only the printer and the software that came with it, for honest comparison.
This blog post represents our “Pro” side of the experience. Open Scott’s side in another tab and compare.
The Model
We each printed the same model from the same source – a coffee cup .STL from Thingiverse, available here. (For the uninitiated, a .STL file to a 3D printer is more or less like a .PDF to your laserjet office printer.) It’s not a super crazy shape, but at the same time requires a bit of support with curved surfaces – about what the “average” 3D print would be.
The Setup/Costs – Stratasys uPrint SE Pro
This is the bad news on our side – you get what you pay for. Stratasys makes the uPrint SE Pro as one of their entry level, professional grade models. It prints a single color at a time, with a single type of material (ABS). To duplicate our setup for this print, you would need the following:
uPrint SE Pro Printer and Dissolving Bath – about $22,000
1 Spool of Model Material (Black) – $205.00 (produces 42 cubic inches of printing)
1 Spool of Support Material – $200.00 (42 cubic inches worth)
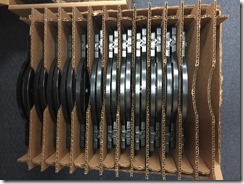
Box of Build Plates – $125.00 for 24 (you need one for each print, so it costs about $5.20/each)
Soluble Concentrate – $149.00 for 12 bottles (dissolves support material, aka fancy drain-O)
Warranty Support – $2,000/year – because it does break from time to time.
Add a little bit of shipping, and for a mere $25K you’re ready to print your very own coffee cup.
Setting Up – Hardware
The good news is, all of our supplies come from the manufacturer of the printer – so the major plus on the “Pro” side is that everything works together.
First, we take a build plate out of the box.
They are plastic and have a texture on them that is magic, because it sticks to 3D material once and cannot be reused. If we are printing something small, then sometimes we can use one corner of the build plate for one print, then another corner later, but it just depends on the day.
The build plate snaps into place on a platform that is extremely solid – Stratasys seems to over-engineer their hardware, which is nice.
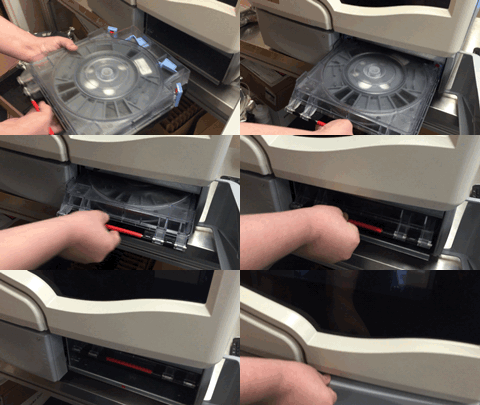
Next, printers need material, so we load both the model material (what our print will actually be made of), and the support material (what the printer uses as filler to support overhanging surfaces, and gets dissolved later).
It comes in a “space bag” and gets loaded into a cartridge.
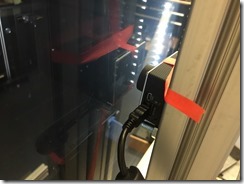
Look closely – you see that little red thing?
That piece acts as a flow-meter for your material spool, and tracks how much material you have left.
Unfortunately, this is what I call the “DRM” of 3D printing. This little module makes sure that you are using a Stratasys material spool, and not material from other vendors. It’s one-way and cannot be “rewound”, so you can sometimes end up with a bit of material left over and the module thinks you’re already done, thus rendering the extra material unusable.
Aside from that, we load the spools, which is a matter of sliding them in and pressing “Load” on the printer panel.
Now we’re ready to do some printing!
I tried to get a great “action shot” timelapse of the print by taping a GoPro to the inside of the door. It’s a little tight in there, so I cut the handle off the build plate to make room for it.
That worked great until the printer heated up, the tape turned to goo and fell off, and the GoPro shut itself down at 125 degrees F. So I had to settle for a GoPro shot outside the door instead.
Setting Up – Software
With this type of printer, you work with Stratays’s “Catalyst” software. Again, everything just works together – no mucking around with config’s and jumping through multiple tools, which is nice.
- Download the .STL from Thingiverse.

- Add the .STL to Catalyst.

- Press “Auto Orient” and “Add to Pack”, progress bars fly and magic happens. (Really, software is just calculating the most efficient way to print it, where the coffee cup needs supports and so forth.)

- Drag it to position it on the build plate where I want it to print.

- Send/queue the print to the printer.
- Hit the blinking “Start Model” button on the printer’s front panel.


Printing
I hit print and walked away. The printer tells me % complete and time remaining (7 hours and 29 minutes) and is also monitored in the Catalyst software.
The printer is very conscious of interrupting airflow, so a magnetic latch engages and prevents us stupid humans from opening the door mid-print, without the software’s permission.

This print ultimately took 8 hours, 22 minutes, at 0.1mm resolution, used 4.84 cubic inches of model material, and 0.433 cubic inches of support material.
Dissolving
Out pops our 3D printed coffee cup!
You can see the model material (in black) and the support material (in white). The white has to disappear, so to do that, we dunk the whole thing in a hot bath.
The bath comes with, and is considered part of the printer. It’s a highly concentrated liquid (resembles Drain-O) mixed with water. We have to change it out every month or so. This unit heats up the liquid, and has a hot-tub style jet inside to keep a continuous flow of water over the part. We use big rubber gloves to prevent contact with this solution on bare skin.
All Done
We lift the container out of the bath, and what remains is our coffee cup and build plate without support material.
A quick rinse, and we’re ready for coffee.
Cost of a Coffee Cup
In direct costs, we used $23.62 in model material, $2.06 in support material, and $5.20 build plate, for a total of $30.88. We have a fancy spreadsheet that calculates our total cost (printer cost over its lifespan, average reusable supplies based on our normal print volume), and our average cost per cubic inch of model printed is about $11.80. So if a customer asked us to print this coffee cup, it would run about $58.00.
On to Scott for the conclusion…
What does the end-result look like in cost/value/process? Was Scott able to print it in one shot without drama, or did 3D printer parts and a tangled mess of open-source bits come flying out of the nearest window in a fit of rage? How close are consumer printers to competing with professional printers in ultimate time and value?
We shipped Scott our version of the coffee cup, and he tallied the final scores. See what he had to say…


